Showing posts with label How to. Show all posts

Thursday, January 3, 2013

Velvety Party Mani

Hello everyone
Today I am going to show you my New Years Eve nails :D
I received a flocking powder kit from the Born Pretty Store to review and thought a nice night out like New Years Eve would be the perfect time to rock such a neat textured nail!

The item I received is the fun flocking powder manicure kit in blue (you can click the link to get your own!) and it retails for $7.99
With the kit you get this massive jar of manicure grade flocking powder, a large pair of tweezers to pick up the stuff, and a little brush for clean up so it's a very good deal!
Unlike the flocking powder you can get at Micheal's or other craft stores, this one is really fine and creates velvety nails. No furry nails here!

Here is my first attempt with the flocking powder kit:


It was actually really simple to do, surprisingly. 
  1. You have to find a polish that is close to the shade of powder you have (I used Barry M in Indigo)
  2. Apply a thin coat of polish on each nail, let it dry                                                                                                                                                       !Do the rest of these steps on 1 finger at a time!                                                                                                                                    
  3. Apply a thicker coat of polish, don't worry if it isn't perfect, just make sure your whole nail is covered in wet polish
  4. Immediately dip your nail into the jar of flocking powder, or use the tweezer to pick up the powder and drop it on to your nail
  5. Make sure the entire nail is covered in flocking powder and using your other hand apply a light pressure all over the nail
  6. Wait a minute or 2 and brush off the excess powder back into the jar
  7. When both of your hands are done, use a moistened towel to remove any powder that is still on your skin

here is what my little set up looked like
The powder does get everywhere so make sure to do this over a paper towel or a sheet of paper...
This manicure was seriously easy peasy!

Since I would be wearing these on New Years, I decided to add a couple of rhinestones... That, my dear friends, was much harder. 
I applied a drop of clear polish to the back of my rhinestone, but as soon as I placed it on my nail, the flocking powder absorbed it all away!
I did eventually manage to get them on there but it required a little bit more clear polish than usual and I also had to apply pressure on each stone until it was dry... 
It was more time consuming than I had anticipated but I really liked the contrast of matte velvety nails and shiny rhinestones!

I took this picture the day after I did them...
This highlights one of the flaws of the velvet mani... fuzzies fuzzies everywhere!
I tried to pick them out but they just kept coming back! Short of using a lint roller on my nails, I'm not really sure how one would get rid of these... 
So the velvet mani is a great and easy way to make your hands stand out, but they're more a of one night deal. After the fuzzy stage, you get to the matted stage. Basically after you get them wet a couple of times, the velvet stuff starts to wear off. It starts to resemble suede more than velvet. 
So if you are looking for a really fun short term mani, I would totally give flocking powder a try :D

Also, because the Born Pretty Store is super awesome, they have given my readers a special code that you can use to get 10% off your purchase of anything on their website. It is HYL91 and if you ever need to find it again, the code is also located on my sidebar!


Have you ever tried flocking powder? what did you think of it?

Until next time ^_^

*The product in this post was provided to me for honest review. Please see my disclosure policy for more information*


Thursday, May 17, 2012

Ways to Fix a Broken Nail

So we've all had some pretty bad nail breaks before... and if you love to do your nails, that can feel pretty disastrous sometimes. One option is to just cut your nail down at or past the break. However, sometimes the break is a little too far down, or maybe you just can't bare to part with your wonderful nails...
Well, there are still options!
My nails break quite a bit. With the research that I do at school, I have to wear gloves a lot. Sure, they protect my hands, but wearing gloves for a long period of time can really take a toll on your nails... I've been using a fortifying base coat (nailTek II) and that does help but I still get breaks once in a while. So I've been looking at some products to help me seal these breaks in order to be able to grow them out!


This is Claudia Stevens Brush On Miracle nail fix- available at Sally's for about $3. All I have to say about this product is do not waste your money. All it is a relatively thick topcoat. An old bottle of Seche Vite would work better in my opinion.
What you have to do with this product is apply 2 thin coats. It can apparently be used a strengthener but I used it to seal some peeling nails.
After I applied this, my break was smooth. I put some polish over it and called it a day. An hour or so later, I noticed that my broken nail was once again poking up. So I took my polish off and reapplied the Miracle Nail Fix. Again, it didn't last more than an hour.
Final verdict- it's hard to believe in anything called "miracle". I would only use this as a last resort.


Next we have SuperNail nail bandages. Available at Sally's as well for $4.99.


The box comes with 3 sticker sheets and a small buffer. Each sheet has 2 large, 4 medium, and 4 small (2 thin and 2 wide) stickers.
these things are super easy to work with. Just find the right size sticker, buff off any sharp edge, and put it on.

For this break, I used a small wide sticker.
You can really see the sticker up close, but back up a few inches and it becomes nearly invisible. The packaging says that this lasts for days. I would say maybe 2 days. After the end of the first day, I started to notice the sides of the sticker coming up. I just took out my manicure scissors and cut the lifted part off. You could probably keep this on for a bit more with this method, but you will have to remove it to change your polish. It will not dissolve in acetone remover. You have to use a new sticker every time you change your nails.

Final verdict- I would definitely use these again, especially if I am out or on vacation and break a nail. They are a temporary fix, but a pretty good one. It keeps the broken part from getting stuck in my hair in the shower or my clothes which keeps it from breaking further.

Then we have Orly Nail Rescue Kit. I didn't take a picture before throwing out the box but follow this link to see what it looks like. This kit is also available at Sally's, this time for $7.99

This kit offers a stronger repair then the ones previously mentioned but it does require upkeep.
The kit comes with a bottle of brush-on glue, a little pot of acrylic powder, and a small buffer. You apply the glue over and around your break, then quickly dip your nail into the acrylic. This will set almost instantly. When you take your nail out, it will be covered in powder, so just brush away the excess and you will be left with a little blob of acrylic where you applied the glue. Using the provided buffer (or your own if you prefer), smooth down the blob.
If you use the one they provide, it will stay slightly gritty so you will want to cover it with an extra layer of base coat. I use my own buffer to really smooth it down. I like to use the buffers that make your nails shiny. You guys know what I'm talking about? It's usually grey and really soft and makes your nails really shine without topcoat. Anyhow, I use that to really make the blob smooth and this keeps it from absorbing my nail polish.

Final verdict- If you have the time, this kit is really worth it. You will have to sand off the blob and reapply a new one every once in a while because the break might actually break through this thin acrylic. For around $8, you will get a lot of use out of this kit. It can also fix any deep dents you have in your nails.
This is my go-to nail fix for the moment.

Lastly I have for you the full acrylic fix. I got this done at a salon for $4. Alternatively, you can get your own acrylic kit and do it yourself at home!

I had this done on my trip to Florida. My poor thumb nail broke on both sides! and one side was much too low for me to think about cutting it down. Since I was not at home and did not have my handy Orly Nail Fix kit, I found a nearby salon who could do it for me :) She buffed down my nail a bit and applied a relatively thin coat of acrylic over my entire nail.
"Relatively" thin coat...
It was a really quick process and I think it was very much worth the price. This thing lasted for 2 weeks! plenty of time for my break to grow out reasonably. The only downside with this fix is the removal. If you are just going to yank off the acrylic, then you shouldn't even bother putting it on. That will damage your nail and cause more breaks for you in the future. You have to soak this thing in pure acetone and slowly buff the acrylic away. Look on YouTube for some really great videos on how to do this or go to the salon to have them take it off for you.

Final verdict- this is great for really bad nail breaks. It lasts a long time and requires no up keep :D
it is however, a pain in the butt to take off. This is something I would do again if I am out of town for a long time and suffer a pretty bad break. I wouldn't do this for smaller breaks, or if I had easy access to my Orly Nail Fix.

So that's it. There are other At-Home nail fix remedies but I have not tried anything else at the moment. If I ever come across a true miracle nail fix, Ill be sure to let you guys know.

How do you fix your nails?

Until next time ^_^


Sunday, February 19, 2012

Corset Nails


Corset Mani

I had seen a few of these on other people's blogs before. They are usually composed of 2 swipes of color on either side of the nail and are connected by a lace that crisscrosses between the 2 (just like my ring finger). So that's what I was going to do!
However, as I was browsing some other blogger's pages, I came across Nail Stories: Hearty Half Moons and they reminded me of the top of a corset! I thought they were so pretty that I had to try it out for this week's challenge!


As you can see, I did the traditional corset nail on my ring finger, but I used Nail Stories "curtain nails" on the rest of my fingers. To make them look corset-ier I added some frillies and bows :)


This mani was super easy to do! For the corset tops, you just need to do 2 quick swipes from side to middle. They don't have to be super straight since you can fix it with the frillies. Then using a migi pen, make little bouncy half circles along the edge and do a quick bow in the center.
The corset back is made up of 2 semi circle swipes of each side of the nail. Make a few dots, those will be the eyelets. Then using your migi pen (or even a striping brush) crisscross the lines.

Easy peasy!

What I used

Base- Franken Lady Fingers
Corset- Essie in Sassy Satchel
Eyelets- GOSH in Silver
Lace and frillies- Migi Nail Art pen in Shimmering White

I've never been able to find the right shade of nude for me so I ended up making my own... It's the closest I have ever come to true mannequin hands!
All you need to make your own nude polish is a lot of white, a dash of brown, some yellow, and a hint of red. If you have darker skin tone, add more brown. If you have cool undertones, more red.
I'm very pale with warm undertones so I needed a lot of yellow and only a little brown :)

Don't forget to check out my Year of Polish page to see other bloggers who are undertaking this challenge as well as to check out past manis and future challenges!

Until next time ^_^


Tuesday, February 14, 2012

Valentine's Mani

Week 7- Valentine's Mani
So I'm a little late on this one. Sorry :(

I had this great idea for a heart shaped water-marble but when I tried to do it on Sunday it was a complete flop. Let's just say that I am not that adept at water-marbling...

So last night, I tried something else...


I started with a silver foil base on my thumb and ring finger. I painted the rest China Glaze Fuchsia Fanatic

Then I drew on a simple looking heart with the brush that is in the bottle. China Glaze has a smaller brush so that made it easier :)

Then using the biggest dotting tool I had (big dotter below), I drew a slightly smaller heart in the silver foil.
Medium dotter, Big dotter

 The medium dotter for the purple...

And the small dotter for the lighter pink!


I used the new Electropop colors from China Glaze for this look:

The I added a rhinestone to the rest of my nails to tie everything in with some shiny and tadah!


Even though this isn't what I had intended, I still like it. It's very pink, which is unusual for me. I have very few pink polishes, which is why I ended up buying the Electropop pinks :) I needed something for my valentine's mani right? Most of my polishes are purple, my favorite color!

Don't forget to check out my Year of Polish page to see some more bloggers' take on these challenges!

Until next time ^_^


Monday, November 7, 2011

Two-fer gradation

hello all!

I found this little gem in my old photos. I did this mani almost a year ago and forgot to post it! This duo of a color gradation with a glitter gradation is super easy to recreate.
If I remember correctly, I only used 2 polishes for this look: Arisa in creamy mocha and Etude house in gold spangle


the trick is to sponge on your base color starting from the tip to the middle of the finger so that most of your color is concentrated at the end.
Then you want to take the glitter and apply one thin layer over the whole nail, followed by one slightly thicker layer over the tip half of the nail and then one last thick layer over the free edge/tip of the nail.

there you go, a two-fer gradation

Until next time ^_^

Monday, October 3, 2011

"Lace" Pastels Skittle nails

sorry for not posting in such a long time. 
Free time has been lacking for a while...
Until things settle down (AKA when I am done with graduate school...) my posts might be more sporadic and  shorter but I will try and continue posting up my nail creations. 


Choose base colors 
Add diagonal french of a slightly darker shade. You could also do a different finish- matte, glitter, shimmer....

Using white liner brush, paint dividing line. then add semi-circles using a small dotter or paint pen.

Thursday, February 3, 2011

Glittery Star

I was trying to figure out a nice mani to use mty Etude House "black" polish for and all I could come up with is a night sky... Original I know...

But I remembered this amazing tutorial by Blue Tape and Nail Tips for super cute shooting star nails. You can see her original blog entry here.

Since I dont have blue painter's tape, I use regular scotch tape.
Here are a few tips I have learned for taping manicures.

  • cut all your tape pieces BEFORE you begin painting your nails. Scissors are not wet  polish friendly
  • before you put the tape on your nail, stick it on the palm of your hand to remove some of the stickyness. This will prevent it from taking up the base layer.
  • after you've placed your tape and painted one nail, remove tape immediately. Dont go on to the other nail until  the tape is off of the first one. You dont want the polish to dry on top of the tape and take off all of your hard work right?
  • finally, wait until your base polish is just dry to the touch to tape things up. If it's too dry (like day after you painted your nails dry) the tape is more likely chip it off. If it's not dry enough... well you know...
tip wear. Partially due to seche vite and partially due to doing the dishes before taking the picture >_<

Green shimmer!

Purple shimmer!
Etude House in Black
OPI in Simmer  and Shimmer
Star is from Bundle Monster on Amazon

Thank you to everyone who has entered the giveaway and welcome to the new followers!
If you haven't done so already, enter the giveaway now! do it do it! Enter the Giveaway here :)


Until next time ^_^

Sunday, January 30, 2011

Easy Peasy Party Nails

This was my New Years mani but it would work equally well for any partyfull occasion.
Step 1- layer down a chrome/foil base
Step 2- add your choice of glitter. 
Repeat step 2 until you have achieved Party Worthy results


Sally Hansen in Celeb City
Urban Outfitters in Sparkle


Even though this was pretty simple, I received lots of compliments on it. I guess sometimes its not about how intricate and detailed things are. 

Until next time ^_^

Friday, December 17, 2010

Smudgy Gradation

In the past I have mostly done gradients that used colors of the same family  because its a lot easier... So I decided to try it with 2 completely different colors, purple and green. Blending was a little hard so I decided to smudge the line with some Out The Door which worked great! I just glopped a ball of Out The Door on the middle of the nail and used the brush to blend the 2 colors together.


Etude House in Beach Green
Etude House in Plum Chou
Etude House in Heart topcoat

Topped the whole shebang with some glittery topcoat (with hearts) and tadah!

Until next time ^_^

Saturday, September 25, 2010

Picture Day

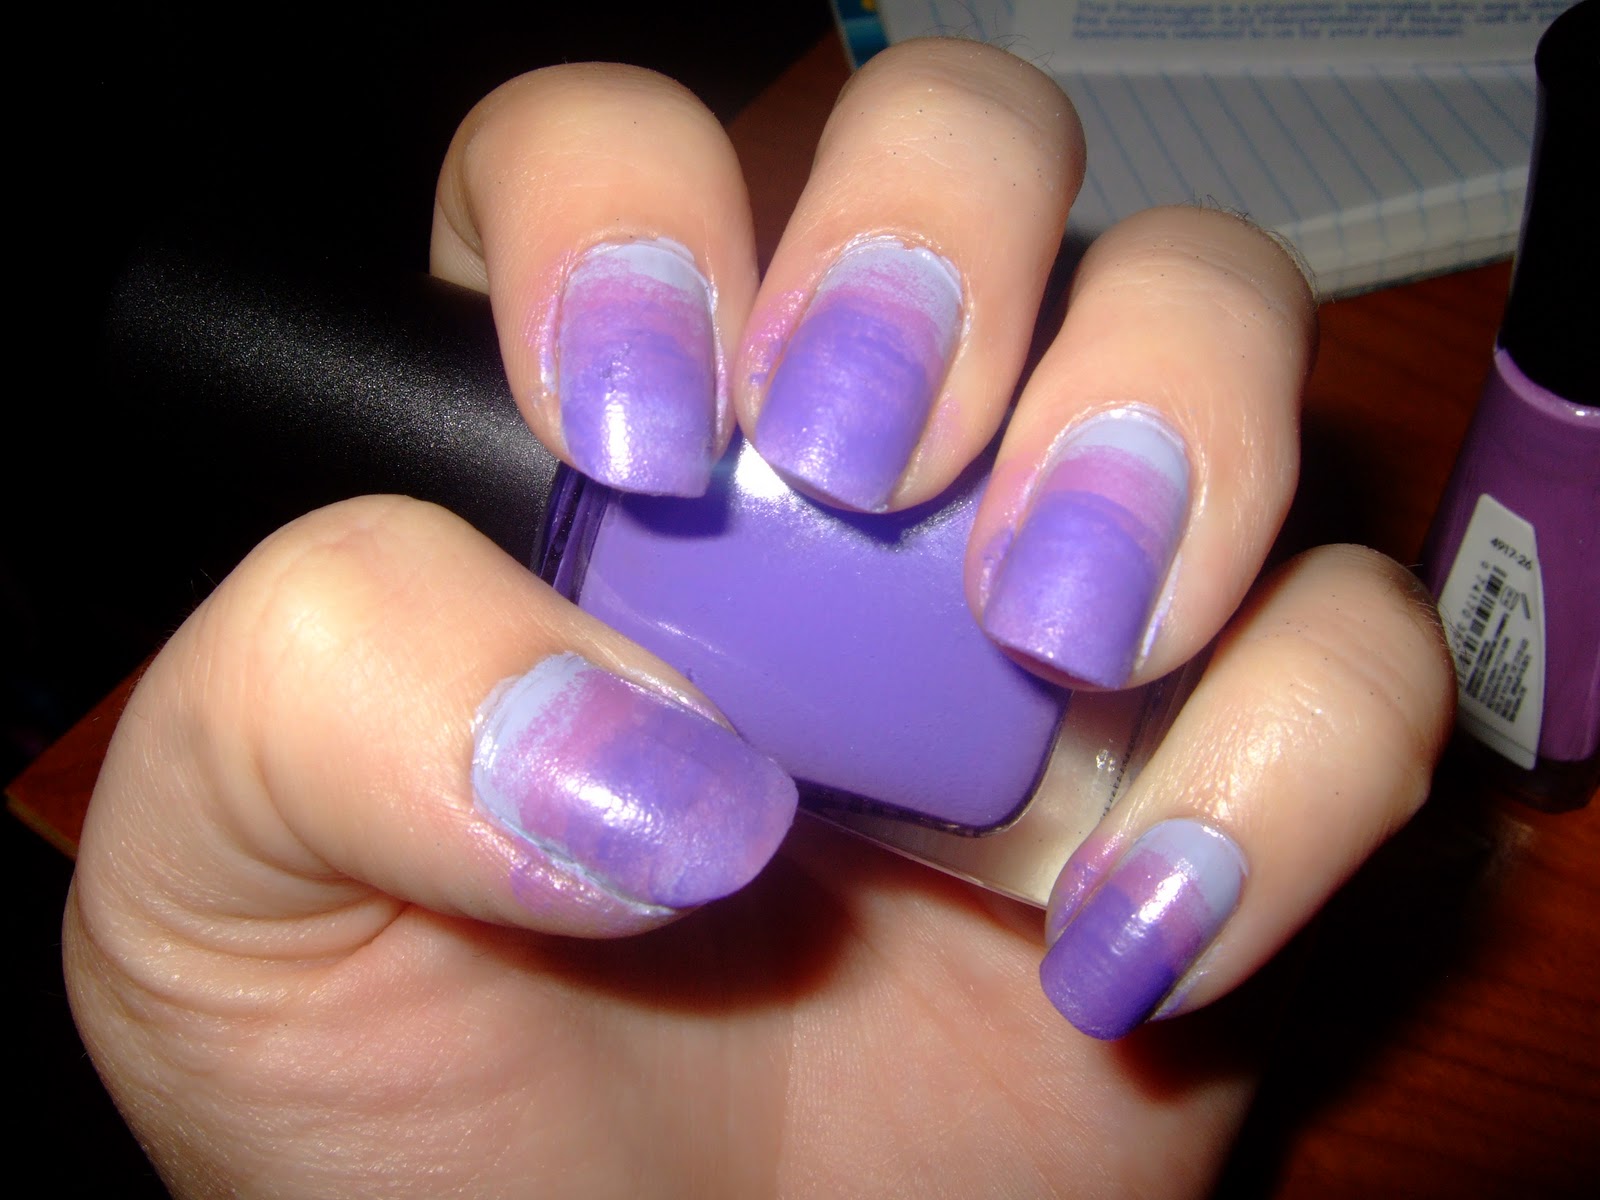
Changed my nails for my senior pictures. Our school colors are purple and gold, so I decided to show a little love for my college and came up with this gradient
Also took some pictures along the way for anyone who does not know how to make a gradient. It's a HOW TO with pictures!
 
Start off with 2-4 shades of a color. Here I chose purple
Apply lightest color to whole nail (after base coat has dried)
using a make-up sponge, apply a darker color to a little over half of the nail with a dabbing motion
like this!
do the same thing with all your colors. From lightest to darkest
 
you could leave them like this or you could...
add a glittery topcoat!

Here are some more pictures of the finished product


Gimp nail is gimp :(
 China Glaze in Agent lavender
Sally Hansen insta-dri in Lively Lilac
Color Club in Pucci-licious
Wet n Wild Fantasy Makers in Vampish Red
Sinful Colors in All About You


I hope you enjoyed :)
Showing posts with label How to. Show all posts

Thursday, January 3, 2013

Velvety Party Mani

Hello everyone
Today I am going to show you my New Years Eve nails :D
I received a flocking powder kit from the Born Pretty Store to review and thought a nice night out like New Years Eve would be the perfect time to rock such a neat textured nail!

The item I received is the fun flocking powder manicure kit in blue (you can click the link to get your own!) and it retails for $7.99
With the kit you get this massive jar of manicure grade flocking powder, a large pair of tweezers to pick up the stuff, and a little brush for clean up so it's a very good deal!
Unlike the flocking powder you can get at Micheal's or other craft stores, this one is really fine and creates velvety nails. No furry nails here!

Here is my first attempt with the flocking powder kit:


It was actually really simple to do, surprisingly. 
  1. You have to find a polish that is close to the shade of powder you have (I used Barry M in Indigo)
  2. Apply a thin coat of polish on each nail, let it dry                                                                                                                                                       !Do the rest of these steps on 1 finger at a time!                                                                                                                                    
  3. Apply a thicker coat of polish, don't worry if it isn't perfect, just make sure your whole nail is covered in wet polish
  4. Immediately dip your nail into the jar of flocking powder, or use the tweezer to pick up the powder and drop it on to your nail
  5. Make sure the entire nail is covered in flocking powder and using your other hand apply a light pressure all over the nail
  6. Wait a minute or 2 and brush off the excess powder back into the jar
  7. When both of your hands are done, use a moistened towel to remove any powder that is still on your skin

here is what my little set up looked like
The powder does get everywhere so make sure to do this over a paper towel or a sheet of paper...
This manicure was seriously easy peasy!

Since I would be wearing these on New Years, I decided to add a couple of rhinestones... That, my dear friends, was much harder. 
I applied a drop of clear polish to the back of my rhinestone, but as soon as I placed it on my nail, the flocking powder absorbed it all away!
I did eventually manage to get them on there but it required a little bit more clear polish than usual and I also had to apply pressure on each stone until it was dry... 
It was more time consuming than I had anticipated but I really liked the contrast of matte velvety nails and shiny rhinestones!

I took this picture the day after I did them...
This highlights one of the flaws of the velvet mani... fuzzies fuzzies everywhere!
I tried to pick them out but they just kept coming back! Short of using a lint roller on my nails, I'm not really sure how one would get rid of these... 
So the velvet mani is a great and easy way to make your hands stand out, but they're more a of one night deal. After the fuzzy stage, you get to the matted stage. Basically after you get them wet a couple of times, the velvet stuff starts to wear off. It starts to resemble suede more than velvet. 
So if you are looking for a really fun short term mani, I would totally give flocking powder a try :D

Also, because the Born Pretty Store is super awesome, they have given my readers a special code that you can use to get 10% off your purchase of anything on their website. It is HYL91 and if you ever need to find it again, the code is also located on my sidebar!


Have you ever tried flocking powder? what did you think of it?

Until next time ^_^

*The product in this post was provided to me for honest review. Please see my disclosure policy for more information*


Thursday, May 17, 2012

Ways to Fix a Broken Nail

So we've all had some pretty bad nail breaks before... and if you love to do your nails, that can feel pretty disastrous sometimes. One option is to just cut your nail down at or past the break. However, sometimes the break is a little too far down, or maybe you just can't bare to part with your wonderful nails...
Well, there are still options!
My nails break quite a bit. With the research that I do at school, I have to wear gloves a lot. Sure, they protect my hands, but wearing gloves for a long period of time can really take a toll on your nails... I've been using a fortifying base coat (nailTek II) and that does help but I still get breaks once in a while. So I've been looking at some products to help me seal these breaks in order to be able to grow them out!


This is Claudia Stevens Brush On Miracle nail fix- available at Sally's for about $3. All I have to say about this product is do not waste your money. All it is a relatively thick topcoat. An old bottle of Seche Vite would work better in my opinion.
What you have to do with this product is apply 2 thin coats. It can apparently be used a strengthener but I used it to seal some peeling nails.
After I applied this, my break was smooth. I put some polish over it and called it a day. An hour or so later, I noticed that my broken nail was once again poking up. So I took my polish off and reapplied the Miracle Nail Fix. Again, it didn't last more than an hour.
Final verdict- it's hard to believe in anything called "miracle". I would only use this as a last resort.


Next we have SuperNail nail bandages. Available at Sally's as well for $4.99.


The box comes with 3 sticker sheets and a small buffer. Each sheet has 2 large, 4 medium, and 4 small (2 thin and 2 wide) stickers.
these things are super easy to work with. Just find the right size sticker, buff off any sharp edge, and put it on.

For this break, I used a small wide sticker.
You can really see the sticker up close, but back up a few inches and it becomes nearly invisible. The packaging says that this lasts for days. I would say maybe 2 days. After the end of the first day, I started to notice the sides of the sticker coming up. I just took out my manicure scissors and cut the lifted part off. You could probably keep this on for a bit more with this method, but you will have to remove it to change your polish. It will not dissolve in acetone remover. You have to use a new sticker every time you change your nails.

Final verdict- I would definitely use these again, especially if I am out or on vacation and break a nail. They are a temporary fix, but a pretty good one. It keeps the broken part from getting stuck in my hair in the shower or my clothes which keeps it from breaking further.

Then we have Orly Nail Rescue Kit. I didn't take a picture before throwing out the box but follow this link to see what it looks like. This kit is also available at Sally's, this time for $7.99

This kit offers a stronger repair then the ones previously mentioned but it does require upkeep.
The kit comes with a bottle of brush-on glue, a little pot of acrylic powder, and a small buffer. You apply the glue over and around your break, then quickly dip your nail into the acrylic. This will set almost instantly. When you take your nail out, it will be covered in powder, so just brush away the excess and you will be left with a little blob of acrylic where you applied the glue. Using the provided buffer (or your own if you prefer), smooth down the blob.
If you use the one they provide, it will stay slightly gritty so you will want to cover it with an extra layer of base coat. I use my own buffer to really smooth it down. I like to use the buffers that make your nails shiny. You guys know what I'm talking about? It's usually grey and really soft and makes your nails really shine without topcoat. Anyhow, I use that to really make the blob smooth and this keeps it from absorbing my nail polish.

Final verdict- If you have the time, this kit is really worth it. You will have to sand off the blob and reapply a new one every once in a while because the break might actually break through this thin acrylic. For around $8, you will get a lot of use out of this kit. It can also fix any deep dents you have in your nails.
This is my go-to nail fix for the moment.

Lastly I have for you the full acrylic fix. I got this done at a salon for $4. Alternatively, you can get your own acrylic kit and do it yourself at home!

I had this done on my trip to Florida. My poor thumb nail broke on both sides! and one side was much too low for me to think about cutting it down. Since I was not at home and did not have my handy Orly Nail Fix kit, I found a nearby salon who could do it for me :) She buffed down my nail a bit and applied a relatively thin coat of acrylic over my entire nail.
"Relatively" thin coat...
It was a really quick process and I think it was very much worth the price. This thing lasted for 2 weeks! plenty of time for my break to grow out reasonably. The only downside with this fix is the removal. If you are just going to yank off the acrylic, then you shouldn't even bother putting it on. That will damage your nail and cause more breaks for you in the future. You have to soak this thing in pure acetone and slowly buff the acrylic away. Look on YouTube for some really great videos on how to do this or go to the salon to have them take it off for you.

Final verdict- this is great for really bad nail breaks. It lasts a long time and requires no up keep :D
it is however, a pain in the butt to take off. This is something I would do again if I am out of town for a long time and suffer a pretty bad break. I wouldn't do this for smaller breaks, or if I had easy access to my Orly Nail Fix.

So that's it. There are other At-Home nail fix remedies but I have not tried anything else at the moment. If I ever come across a true miracle nail fix, Ill be sure to let you guys know.

How do you fix your nails?

Until next time ^_^


Sunday, February 19, 2012

Corset Nails


Corset Mani

I had seen a few of these on other people's blogs before. They are usually composed of 2 swipes of color on either side of the nail and are connected by a lace that crisscrosses between the 2 (just like my ring finger). So that's what I was going to do!
However, as I was browsing some other blogger's pages, I came across Nail Stories: Hearty Half Moons and they reminded me of the top of a corset! I thought they were so pretty that I had to try it out for this week's challenge!


As you can see, I did the traditional corset nail on my ring finger, but I used Nail Stories "curtain nails" on the rest of my fingers. To make them look corset-ier I added some frillies and bows :)


This mani was super easy to do! For the corset tops, you just need to do 2 quick swipes from side to middle. They don't have to be super straight since you can fix it with the frillies. Then using a migi pen, make little bouncy half circles along the edge and do a quick bow in the center.
The corset back is made up of 2 semi circle swipes of each side of the nail. Make a few dots, those will be the eyelets. Then using your migi pen (or even a striping brush) crisscross the lines.

Easy peasy!

What I used

Base- Franken Lady Fingers
Corset- Essie in Sassy Satchel
Eyelets- GOSH in Silver
Lace and frillies- Migi Nail Art pen in Shimmering White

I've never been able to find the right shade of nude for me so I ended up making my own... It's the closest I have ever come to true mannequin hands!
All you need to make your own nude polish is a lot of white, a dash of brown, some yellow, and a hint of red. If you have darker skin tone, add more brown. If you have cool undertones, more red.
I'm very pale with warm undertones so I needed a lot of yellow and only a little brown :)

Don't forget to check out my Year of Polish page to see other bloggers who are undertaking this challenge as well as to check out past manis and future challenges!

Until next time ^_^


Tuesday, February 14, 2012

Valentine's Mani

Week 7- Valentine's Mani
So I'm a little late on this one. Sorry :(

I had this great idea for a heart shaped water-marble but when I tried to do it on Sunday it was a complete flop. Let's just say that I am not that adept at water-marbling...

So last night, I tried something else...


I started with a silver foil base on my thumb and ring finger. I painted the rest China Glaze Fuchsia Fanatic

Then I drew on a simple looking heart with the brush that is in the bottle. China Glaze has a smaller brush so that made it easier :)

Then using the biggest dotting tool I had (big dotter below), I drew a slightly smaller heart in the silver foil.
Medium dotter, Big dotter

 The medium dotter for the purple...

And the small dotter for the lighter pink!


I used the new Electropop colors from China Glaze for this look:

The I added a rhinestone to the rest of my nails to tie everything in with some shiny and tadah!


Even though this isn't what I had intended, I still like it. It's very pink, which is unusual for me. I have very few pink polishes, which is why I ended up buying the Electropop pinks :) I needed something for my valentine's mani right? Most of my polishes are purple, my favorite color!

Don't forget to check out my Year of Polish page to see some more bloggers' take on these challenges!

Until next time ^_^


Monday, November 7, 2011

Two-fer gradation

hello all!

I found this little gem in my old photos. I did this mani almost a year ago and forgot to post it! This duo of a color gradation with a glitter gradation is super easy to recreate.
If I remember correctly, I only used 2 polishes for this look: Arisa in creamy mocha and Etude house in gold spangle


the trick is to sponge on your base color starting from the tip to the middle of the finger so that most of your color is concentrated at the end.
Then you want to take the glitter and apply one thin layer over the whole nail, followed by one slightly thicker layer over the tip half of the nail and then one last thick layer over the free edge/tip of the nail.

there you go, a two-fer gradation

Until next time ^_^

Monday, October 3, 2011

"Lace" Pastels Skittle nails

sorry for not posting in such a long time. 
Free time has been lacking for a while...
Until things settle down (AKA when I am done with graduate school...) my posts might be more sporadic and  shorter but I will try and continue posting up my nail creations. 


Choose base colors 
Add diagonal french of a slightly darker shade. You could also do a different finish- matte, glitter, shimmer....

Using white liner brush, paint dividing line. then add semi-circles using a small dotter or paint pen.

Thursday, February 3, 2011

Glittery Star

I was trying to figure out a nice mani to use mty Etude House "black" polish for and all I could come up with is a night sky... Original I know...

But I remembered this amazing tutorial by Blue Tape and Nail Tips for super cute shooting star nails. You can see her original blog entry here.

Since I dont have blue painter's tape, I use regular scotch tape.
Here are a few tips I have learned for taping manicures.

  • cut all your tape pieces BEFORE you begin painting your nails. Scissors are not wet  polish friendly
  • before you put the tape on your nail, stick it on the palm of your hand to remove some of the stickyness. This will prevent it from taking up the base layer.
  • after you've placed your tape and painted one nail, remove tape immediately. Dont go on to the other nail until  the tape is off of the first one. You dont want the polish to dry on top of the tape and take off all of your hard work right?
  • finally, wait until your base polish is just dry to the touch to tape things up. If it's too dry (like day after you painted your nails dry) the tape is more likely chip it off. If it's not dry enough... well you know...
tip wear. Partially due to seche vite and partially due to doing the dishes before taking the picture >_<

Green shimmer!

Purple shimmer!
Etude House in Black
OPI in Simmer  and Shimmer
Star is from Bundle Monster on Amazon

Thank you to everyone who has entered the giveaway and welcome to the new followers!
If you haven't done so already, enter the giveaway now! do it do it! Enter the Giveaway here :)


Until next time ^_^

Sunday, January 30, 2011

Easy Peasy Party Nails

This was my New Years mani but it would work equally well for any partyfull occasion.
Step 1- layer down a chrome/foil base
Step 2- add your choice of glitter. 
Repeat step 2 until you have achieved Party Worthy results


Sally Hansen in Celeb City
Urban Outfitters in Sparkle


Even though this was pretty simple, I received lots of compliments on it. I guess sometimes its not about how intricate and detailed things are. 

Until next time ^_^

Friday, December 17, 2010

Smudgy Gradation

In the past I have mostly done gradients that used colors of the same family  because its a lot easier... So I decided to try it with 2 completely different colors, purple and green. Blending was a little hard so I decided to smudge the line with some Out The Door which worked great! I just glopped a ball of Out The Door on the middle of the nail and used the brush to blend the 2 colors together.


Etude House in Beach Green
Etude House in Plum Chou
Etude House in Heart topcoat

Topped the whole shebang with some glittery topcoat (with hearts) and tadah!

Until next time ^_^

Saturday, September 25, 2010

Picture Day

Changed my nails for my senior pictures. Our school colors are purple and gold, so I decided to show a little love for my college and came up with this gradient
Also took some pictures along the way for anyone who does not know how to make a gradient. It's a HOW TO with pictures!
 
Start off with 2-4 shades of a color. Here I chose purple
Apply lightest color to whole nail (after base coat has dried)
using a make-up sponge, apply a darker color to a little over half of the nail with a dabbing motion
like this!
do the same thing with all your colors. From lightest to darkest
 
you could leave them like this or you could...
add a glittery topcoat!

Here are some more pictures of the finished product


Gimp nail is gimp :(
 China Glaze in Agent lavender
Sally Hansen insta-dri in Lively Lilac
Color Club in Pucci-licious
Wet n Wild Fantasy Makers in Vampish Red
Sinful Colors in All About You


I hope you enjoyed :)