Showing posts with label Online Store. Show all posts

Monday, February 18, 2013

Post Valentine Detox Nails- Studs Baby!

After about a month of pink and red cutesy nails, I thought you might all be in need of a more edgy design!
Today I have for you my first mani using studs :D
I was really excited to try this out because I have seen these everywhere on the internet. However, none of my local nail shops carried them >_< which is why it has taken me so long to jump on this awesome train...
But now, I have studs, so many studs! and here is what I did with them


Flash picture to show the subtle shimmer stripe :)


Wet n Wild in Black Creme
 L'Oreal in Owl's Night (stripe)
Studs from The Born Pretty Store 
All sealed up with a thick coat of Seche Vite


So after 3 days of stud-y nails, I've noticed that these don't hold up all that well. I had 1 mini-round stud fall off the morning after I did them, a square one fell off 24 hours later, and the remaining studs are starting to fade to silver... Maybe I didn't use the right kind of topcoat, or maybe this is the kind of mani that requires nightly TC application. I don't know, I suppose I will have to try again.

However, even though they don't stay on too well, I think they are completely worth it! The shine off these bad boys was incredible! People had no choice but the notice my nails haha! Consequently, I received quite a few compliments on these. Next time I will stick to the silver studs to avoid the color rubbing off part, but then again, maybe a thicker top coat could have avoided that entirely?

If you are looking for your own studs, and who isn't really ;) I received mine from The Born Pretty Store.
The little wheel box had tons of little shapes, in both silver and gold, making it the perfect starter kit to studs!

At less than $5, it is a pretty darn good bargain. You can click the picture to be taken directly to the product page and as always, feel free to use my coupon code to get 10% off your order.

Have you ever used nail art studs before? What did you use to "glue" them down?

Until next time ^_^

*The product in this post was provided to me for honest review. Please see my disclosure policy for more information*

Sunday, January 20, 2013

Valentine's day gift from the Born Pretty Store!

Quick post to let you all know about the neat promotion going on at  the Born Pretty Store starting today!

all orders place between the 20th and the 24th will receive a FREE crystal infinity ring and if you spend over $15 dollars, you will also get an extra free jewelry item (that they will pick for you).


You can stock up on your favorite nail art goodies, pick up a few specialty polishes, and even score some cute accessories! everything ships for free! and to make your money go even further, feel free to use my coupon code when you check out :D

Here are a few items I've got my eyes on!
(you can click the picture to be taken to the product page)

3D bow stickers

Tiny metal decals
Mohair loop scarf
Hello Kitty key necklace

Until next time ^_^


Thursday, January 3, 2013

Velvety Party Mani

Hello everyone
Today I am going to show you my New Years Eve nails :D
I received a flocking powder kit from the Born Pretty Store to review and thought a nice night out like New Years Eve would be the perfect time to rock such a neat textured nail!

The item I received is the fun flocking powder manicure kit in blue (you can click the link to get your own!) and it retails for $7.99
With the kit you get this massive jar of manicure grade flocking powder, a large pair of tweezers to pick up the stuff, and a little brush for clean up so it's a very good deal!
Unlike the flocking powder you can get at Micheal's or other craft stores, this one is really fine and creates velvety nails. No furry nails here!

Here is my first attempt with the flocking powder kit:


It was actually really simple to do, surprisingly. 
  1. You have to find a polish that is close to the shade of powder you have (I used Barry M in Indigo)
  2. Apply a thin coat of polish on each nail, let it dry                                                                                                                                                       !Do the rest of these steps on 1 finger at a time!                                                                                                                                    
  3. Apply a thicker coat of polish, don't worry if it isn't perfect, just make sure your whole nail is covered in wet polish
  4. Immediately dip your nail into the jar of flocking powder, or use the tweezer to pick up the powder and drop it on to your nail
  5. Make sure the entire nail is covered in flocking powder and using your other hand apply a light pressure all over the nail
  6. Wait a minute or 2 and brush off the excess powder back into the jar
  7. When both of your hands are done, use a moistened towel to remove any powder that is still on your skin

here is what my little set up looked like
The powder does get everywhere so make sure to do this over a paper towel or a sheet of paper...
This manicure was seriously easy peasy!

Since I would be wearing these on New Years, I decided to add a couple of rhinestones... That, my dear friends, was much harder. 
I applied a drop of clear polish to the back of my rhinestone, but as soon as I placed it on my nail, the flocking powder absorbed it all away!
I did eventually manage to get them on there but it required a little bit more clear polish than usual and I also had to apply pressure on each stone until it was dry... 
It was more time consuming than I had anticipated but I really liked the contrast of matte velvety nails and shiny rhinestones!

I took this picture the day after I did them...
This highlights one of the flaws of the velvet mani... fuzzies fuzzies everywhere!
I tried to pick them out but they just kept coming back! Short of using a lint roller on my nails, I'm not really sure how one would get rid of these... 
So the velvet mani is a great and easy way to make your hands stand out, but they're more a of one night deal. After the fuzzy stage, you get to the matted stage. Basically after you get them wet a couple of times, the velvet stuff starts to wear off. It starts to resemble suede more than velvet. 
So if you are looking for a really fun short term mani, I would totally give flocking powder a try :D

Also, because the Born Pretty Store is super awesome, they have given my readers a special code that you can use to get 10% off your purchase of anything on their website. It is HYL91 and if you ever need to find it again, the code is also located on my sidebar!


Have you ever tried flocking powder? what did you think of it?

Until next time ^_^

*The product in this post was provided to me for honest review. Please see my disclosure policy for more information*


Wednesday, April 18, 2012

mbeautylounge- buyer beware!

Hello everyone!

Today's post is about an unfortunate event that occured to me earlier this year. I was browsing some nail blogs (because that's what nail bloggers do!) and I came across a swatch of OPI I Lily Love You. 
What a gorgeous flakie! the collection came out while I was taking my blogging sabbatical last summer and apparently that particular shade sold out pretty quickly.
I looked around at a few e-tailers and came across mbeautylounge.com

This was my first time on the site but it looked legitimate and nice. It had websafe check out and a good shipping policy and the prices were incredible!
I ordered 2 bottles of I Lily Love You, along with 2 OPI Mrs America, 2 OPI Nikki Minaj, and 1 OPI from the France collection.

The company is located about an hour away from where I live in Ohio so I thought I would be receiving my package very quickly. However, it took over 10 days of processing before my package was shipped out! This was much longer than the 48-72 hours promised on the website...

Regardless, my box finally got here! hooray! I opened it up, excited to see my new pretties but was shocked by the fact that the polishes were simply thrown in the box with some tissue paper. No bubble wrap. No foam peanuts. What was this person thinking?? Gladly, the trip wasn't very long and all of the bottles arrived in one piece. Good right?

Here is what I received:
Looks pretty good no? but where is I Lily Love You, you ask? That's what I wondered as well. I looked through the box and found a slip of paper with my order.  I Lily Love You was striked off and the word credited was handwritten. How disappointing! they must have sold out right?

I logged on to my Mbeautylounge account and checked to see if I had any credits or vouchers but found nothing... I then went to the OPI section and found that I Lily Love You was still there. With the option to add it to your cart. So it wasn't sold out?

I decided to send a polite message to the company via their "contact us" page asking what happened to my order. I hit send and was promised an answer within 48 hours.
after 3 days with no answer, I sent another message. Briefer than the first but still polite. Again, no answer...
10 days later, I wrote them a pretty extensive message asking to be given a refund (it was $16 worth of polish!). I also told them I would be reviewing their company on my blog (as I am doing now).

A day later I received a message from them to tell me a voucher had been created for the amount I was owed. It could be found on my account on Mbeautylounge.com

Finally! after about a month of messaging, it looks like there is someone over at Mbeautylounge after all! Since I was prepping for the giveaway that just ended, I decided to use the voucher to get some polishes for you guys. I didn't trust Mbeautylounge but I sure as heck was not going to let them keep my $16! So I order 3 bottles of Zoya: Ivanka, Valerie, and Charla.

After about 12 days of processing, here is what I received:

This time Charla was missing! what is up with this company?? the order slip once again  claimed that I had been "credited"... I did send a message to the company about the missing polish but I am much to exhausted to deal with them any more. 

Overall, Mbeautylounge is not a place I will be ordering from any more. They have great prices and a variety of collections but this was not worth it. 

Oh well, live and learn right? 
have you ever had to deal with a dodgy company before?

Until next time ^_^


**EDIT** About 2 months since my last email, MBeautyLounge just issued me a refund for the missing Zoya. Can't promise they will do the same for you but it looks like patience pays off with this company...

Wednesday, February 22, 2012

Crackle Gradient- Everbella Shatter Crackle

Hello everyone!

Today I have something that I have been wanting to try for a while! A gradient using crackle polish!
Gradient manis can be tricky so I didn't know how well crackle polishes would blend to create a gradient effect.

This idea started when the lovely Florence over at Everbella sent me a nifty crackle polish kit for review. 
The kit came safely packaged in a corrugated box which was shipped in a bubble mailer  

Base color, Crackle polish, and Top coat
The crackle polish kit comes with a base color which varies, a crackle polish, and a small bottle of topcoat. The base color I received is a nice shimmery apple green and the crackle I was sent is BH14- Dark Green.
Everbella has more than 30 shades of crackle polish! a crackle for every occasion :D
From everbella.com Click to enlarge and see each in detail!
 Each of these crackle come in a kit (with base polish and topcoat) for only $4.99 which is a really good deal. Of course, you're probably wondering about the quality of the polish for that price right?
Well I'm going to show you swatches of the crackle further down, but the base polish was surprisingly good. The formula was a little thick but it applied nicely and the whole thing was opaque in 1 coat! The only real downside of this polish is the strange smell it has. I remember someone remarking that is smelled just like silly string, and truly it does. It's a mild chemically smell that goes away once the polish dries.

Now the crackle!!

Here is the final look of the mani:


I created it using 4 different crackle polishes and made 2 different gradients :)
Funky Fingers Teal Scales, X&D BH14, China Glaze Oxidized Aqua, Funky Fingers Silver Scales. The base color I used is Sally Hansen Brisk Blue

Funky Fingers in Teal Scales is dark green with load of glitter. It crackled decently well but it wasn't the best of the bunch! It must be applied over polish for the crackle effect to appear.


X&D in BH14 is dark green and dries to a matte finish. If you add topcoat, a subtle green shimmer emerges! the swatch on the nail wheel has no topcoat while my fingers above do so that you can see the difference :) This one took the longest to crack but had the nicest effect and formula overall. It did stain when I applied it over white polish but had no issues with it over Brisk Blue. This one does not need to be applied over polish to crackle!


China Glaze in Oxidized Aqua is light green metallic with small blue glitter. The formula for this one was very runny and didn't crackle as well as the others. I must be applied over polish to crackle.


Funky Fingers in Silver scale is a shimmery metallic silver. The formula on this one was pretty runny as well. It also tended to crackle in larger chunks. It must be applied over polish for the crackle effect to appear.


To create your own crackle gradient, all you need is a least 2 colors (preferably in the same color family) of crackle polish and a base color!
Take one of your first crackle and apply it from the cuticle side until half way down the nail. Then quickly take your second color and apply it a little bit above where the first color finished and drag it down to the tip. This should slightly blend the 2 polishes together. The crackling effect will take care of the rest!

Here is a nail wheel where I fooled around with some color combinations


As you can see, even though these are all different brands of crackle polish, they all seemed to blend together nicely!


I picked my 2 favorites from the wheel: Silver Scales to Oxidize Aqua to BH14 and BH14 to Teal Scales to create my gradient look

This is a really easy way to get gradient nails since the crackle polish breaks the whole thing up. It make the lines between the colors disappear! if you want to try this for yourself, you can pick up some great crackle polish at Everbella's online store: Everbella.com. Don't forget to use the code on the sidebar to get 10% off any item!

What do you think of the crackle gradient?

Until next time ^_^

*This item was sent to me for review, however, I provided my honest opinion of the product*


Tuesday, February 21, 2012

Nubar Mail!- Bynubar.com review

I was really excited when I saw the new Polka Dot set by Nubar. They are so pretty no??

image from bynubar.com

I was still on the waiting list for Lynnderella's Connect the Dots so I thought these puppies could satisfy my craving for black and white glitter toppers until I could finally get my hands on CTD...

I ordered my set from Bynubar.com. I looked around on amazon and other online retailers to see if I could get a better deal but in the end, if you want both White Polka Dot and Black Polka Dot, I recommend getting it directly from the source!
For $20 you get both Polka Dot toppers and Diamont Seal and Shine, which is a really good top coat!
The set came in this poly box. The outside of the box was very dusty... This picture was taken after I had blown most of the dust off, and there is still a lot there. However, the inside of the box was pristine so I didn't really care.
Here they are outside of the box! the Black Polka Dot reminds me of the black bean abyss they have at Moe's Southwest Grill. It's just a big pot of boiled black beans that you can have them put on pretty much anything you order. It looks like a bubbling cauldron of black plague but it tastes delicious!
White Polka dot is much more innocent looking in comparison no? As you can see here, the white is a little more of a pearly white. The glitters are a little translucent but still very pretty.
And of course the Diamont top coat peeking in the back!

Star Sparkle and Night Sparkle
 also went ahead and ordered 2 Nubar polishes that I had been lemming for! Star Sparkle, a silver holographic glitter, and Night Sparkle, a dark blue glitter. These are both full coverage glitters and take 2-3 coats...

My overall experience with Bynubar.com was rather pleasant. Shipping was a little higher than I expected it to be (at over $13 for 5 bottles of Domestic polish) so that was a little disappointing. I fiddled around with what was in my cart to try and figure out how their shipping works. For 1 bottle of polish, shipping to Ohio was $13 ish dollars, adding the polka dot kit and another bottle did not vary that price. Adding another 3 polish kit, however, increased shipping by about $1. So if you are going to order something from this site, I recommend you make it worth the shipping and order more than just a couple bottles...
*please be aware that shipping is likely to vary by location. Your shipping may be significantly different from mine if you live on the west coast for example*
It took about 3 days for my order to process and an additional 3 days for shipping. Shipping was done via UPS. I personally do not have a preference between USPS and UPS other than USPS usually being cheaper but I know that some of you do :)

Most of you probably know about the quality of this brand so I won't babble on too long about it. Mostly these met my expectation for the brand. I can't wait to mess around with these :D

Also, as luck would have it, the day I ordered these, I received an email from Llarowe saying that my bottle of Connect the Dots had been shipped >_<
Oh well, now I have lots of black and white glitter toppers to show you guys! woohoo!

What would you prefer, Nubar Polka Dot or Lynnderella Connect the Dots?

Until next time ^_^


Tuesday, November 2, 2010

Cherry Culture!

Sorry about the lack of updates :( I have been sick. Just a cold, but I've been spending all my free time sleeping to get rid of it. But now! I am better! so a long overdue review of Cherry Culture will start things back up

Alrighty! I ended my month-long (ish) no buy with this spree :D lots of nail polishes were on sale so I got quite a few.
This is after I opened everything up in the mail room :( I was too excited to see all my goodies
They were all wrapped in bubble wrap and arrived in pristine condition.
Shipping was free due to a promotion (if you spent a certain amount...)
A couple of nail treatments. Ive been using the whitener as a basecoat for about a week now, but I have seen no difference yet. Obviously it would take longer than a week to work so who knows!
Awesome metallics! need a couple of coats to go opaque though

My first LA Colors. The red was a jelly :( is there even a true red creme out there???

My first NYX polishes as well
This came in a set from LA Colors called explosive. $3 for four polishes!
A much needed brown creme and more glitter :D
 These little guys were my only issue with Cherry culture. It appears that they had the sinful colors labeled wrong. I was expecting (151) St. Thomas (the bronze color) to be a nice pearly white with a ton of glitter and (958) Let's Meet was labeled on the site as a green with golden shimmer... The bronze and yellow were very unexpected. They are super pretty colors. The only issue is that I already have polishes that are pretty much the same as both of these :(  I have the option of returning them for store credit but the shipping would kind of make it pointless. 
Maybe if I have a giveaway, I can throw these in :) for the moment, they sit on my desk...

Alright, so Cherryculture.com
good prices. nice selection. Not too sure about the customer service.... I emailed them about the mislabeling issue and never got a word back... Also, the mislabeling on their site has not yet been fixed so if you order a color, I recommend you double check with another website to make sure thats the color they are showing you. I believe this is only an issue with the sinful color polishes...
Other than this misadventure, I am enjoying my new goodies

Thursday, September 23, 2010

8ty8 Beauty- Budget friendly!


I am a China Glaze-holic. I love their formula. I love their colors. They are simply amazing. And also the reason I got into nail art (because of their water marbling video on their website). Unfortunately, I am a poor college student and their product isn't always the most affordable.
That will no longer be an issue however, since I found the AMAZING 8ty8 online store! For $2.68 a bottle, this make China Glaze cheaper than most drugstore brands. Yes, yes.. shipping costs are a hassle, but eh... Buy lots at once and the saving will definitely make up for the shipping costs.
My experience with 8ty8 beauty was great. Their website is minimalistic and easy to navigate. Lots! of nail polish brands like Color Club, Orly, Art Club, Seche Vite, and of course, China glaze. They also have rhinestones, decals, and accessories for a really good price. Shipping was $8 for me, which I see as fair. 
Here is my loot!

Tadah! All of this stuff, with shipping, cost me $30
For Audrey, Agent Lavender, Peachy Keen, Secret Peri-wink-le
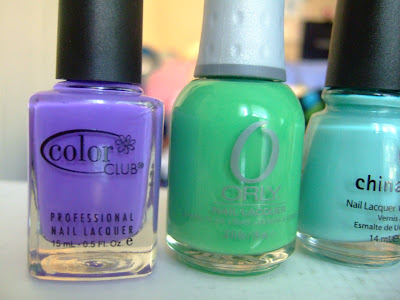
CC- Pucci-licious, Orly- Mint Mojito
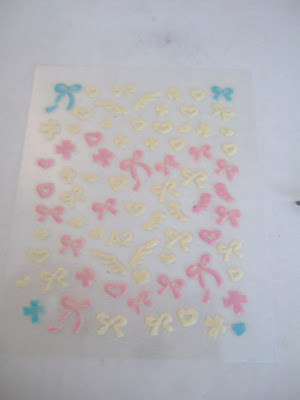
3-D Stickers ($1)
Double ended nail tools

the other ends...

In conclusion, I recommend this store for polish more than tools and accessories.
If you want to know more, just ask me :)
Showing posts with label Online Store. Show all posts

Monday, February 18, 2013

Post Valentine Detox Nails- Studs Baby!

After about a month of pink and red cutesy nails, I thought you might all be in need of a more edgy design!
Today I have for you my first mani using studs :D
I was really excited to try this out because I have seen these everywhere on the internet. However, none of my local nail shops carried them >_< which is why it has taken me so long to jump on this awesome train...
But now, I have studs, so many studs! and here is what I did with them


Flash picture to show the subtle shimmer stripe :)


Wet n Wild in Black Creme
 L'Oreal in Owl's Night (stripe)
Studs from The Born Pretty Store 
All sealed up with a thick coat of Seche Vite


So after 3 days of stud-y nails, I've noticed that these don't hold up all that well. I had 1 mini-round stud fall off the morning after I did them, a square one fell off 24 hours later, and the remaining studs are starting to fade to silver... Maybe I didn't use the right kind of topcoat, or maybe this is the kind of mani that requires nightly TC application. I don't know, I suppose I will have to try again.

However, even though they don't stay on too well, I think they are completely worth it! The shine off these bad boys was incredible! People had no choice but the notice my nails haha! Consequently, I received quite a few compliments on these. Next time I will stick to the silver studs to avoid the color rubbing off part, but then again, maybe a thicker top coat could have avoided that entirely?

If you are looking for your own studs, and who isn't really ;) I received mine from The Born Pretty Store.
The little wheel box had tons of little shapes, in both silver and gold, making it the perfect starter kit to studs!

At less than $5, it is a pretty darn good bargain. You can click the picture to be taken directly to the product page and as always, feel free to use my coupon code to get 10% off your order.

Have you ever used nail art studs before? What did you use to "glue" them down?

Until next time ^_^

*The product in this post was provided to me for honest review. Please see my disclosure policy for more information*

Sunday, January 20, 2013

Valentine's day gift from the Born Pretty Store!

Quick post to let you all know about the neat promotion going on at  the Born Pretty Store starting today!

all orders place between the 20th and the 24th will receive a FREE crystal infinity ring and if you spend over $15 dollars, you will also get an extra free jewelry item (that they will pick for you).


You can stock up on your favorite nail art goodies, pick up a few specialty polishes, and even score some cute accessories! everything ships for free! and to make your money go even further, feel free to use my coupon code when you check out :D

Here are a few items I've got my eyes on!
(you can click the picture to be taken to the product page)

3D bow stickers

Tiny metal decals
Mohair loop scarf
Hello Kitty key necklace

Until next time ^_^


Thursday, January 3, 2013

Velvety Party Mani

Hello everyone
Today I am going to show you my New Years Eve nails :D
I received a flocking powder kit from the Born Pretty Store to review and thought a nice night out like New Years Eve would be the perfect time to rock such a neat textured nail!

The item I received is the fun flocking powder manicure kit in blue (you can click the link to get your own!) and it retails for $7.99
With the kit you get this massive jar of manicure grade flocking powder, a large pair of tweezers to pick up the stuff, and a little brush for clean up so it's a very good deal!
Unlike the flocking powder you can get at Micheal's or other craft stores, this one is really fine and creates velvety nails. No furry nails here!

Here is my first attempt with the flocking powder kit:


It was actually really simple to do, surprisingly. 
  1. You have to find a polish that is close to the shade of powder you have (I used Barry M in Indigo)
  2. Apply a thin coat of polish on each nail, let it dry                                                                                                                                                       !Do the rest of these steps on 1 finger at a time!                                                                                                                                    
  3. Apply a thicker coat of polish, don't worry if it isn't perfect, just make sure your whole nail is covered in wet polish
  4. Immediately dip your nail into the jar of flocking powder, or use the tweezer to pick up the powder and drop it on to your nail
  5. Make sure the entire nail is covered in flocking powder and using your other hand apply a light pressure all over the nail
  6. Wait a minute or 2 and brush off the excess powder back into the jar
  7. When both of your hands are done, use a moistened towel to remove any powder that is still on your skin

here is what my little set up looked like
The powder does get everywhere so make sure to do this over a paper towel or a sheet of paper...
This manicure was seriously easy peasy!

Since I would be wearing these on New Years, I decided to add a couple of rhinestones... That, my dear friends, was much harder. 
I applied a drop of clear polish to the back of my rhinestone, but as soon as I placed it on my nail, the flocking powder absorbed it all away!
I did eventually manage to get them on there but it required a little bit more clear polish than usual and I also had to apply pressure on each stone until it was dry... 
It was more time consuming than I had anticipated but I really liked the contrast of matte velvety nails and shiny rhinestones!

I took this picture the day after I did them...
This highlights one of the flaws of the velvet mani... fuzzies fuzzies everywhere!
I tried to pick them out but they just kept coming back! Short of using a lint roller on my nails, I'm not really sure how one would get rid of these... 
So the velvet mani is a great and easy way to make your hands stand out, but they're more a of one night deal. After the fuzzy stage, you get to the matted stage. Basically after you get them wet a couple of times, the velvet stuff starts to wear off. It starts to resemble suede more than velvet. 
So if you are looking for a really fun short term mani, I would totally give flocking powder a try :D

Also, because the Born Pretty Store is super awesome, they have given my readers a special code that you can use to get 10% off your purchase of anything on their website. It is HYL91 and if you ever need to find it again, the code is also located on my sidebar!


Have you ever tried flocking powder? what did you think of it?

Until next time ^_^

*The product in this post was provided to me for honest review. Please see my disclosure policy for more information*


Wednesday, April 18, 2012

mbeautylounge- buyer beware!

Hello everyone!

Today's post is about an unfortunate event that occured to me earlier this year. I was browsing some nail blogs (because that's what nail bloggers do!) and I came across a swatch of OPI I Lily Love You. 
What a gorgeous flakie! the collection came out while I was taking my blogging sabbatical last summer and apparently that particular shade sold out pretty quickly.
I looked around at a few e-tailers and came across mbeautylounge.com

This was my first time on the site but it looked legitimate and nice. It had websafe check out and a good shipping policy and the prices were incredible!
I ordered 2 bottles of I Lily Love You, along with 2 OPI Mrs America, 2 OPI Nikki Minaj, and 1 OPI from the France collection.

The company is located about an hour away from where I live in Ohio so I thought I would be receiving my package very quickly. However, it took over 10 days of processing before my package was shipped out! This was much longer than the 48-72 hours promised on the website...

Regardless, my box finally got here! hooray! I opened it up, excited to see my new pretties but was shocked by the fact that the polishes were simply thrown in the box with some tissue paper. No bubble wrap. No foam peanuts. What was this person thinking?? Gladly, the trip wasn't very long and all of the bottles arrived in one piece. Good right?

Here is what I received:
Looks pretty good no? but where is I Lily Love You, you ask? That's what I wondered as well. I looked through the box and found a slip of paper with my order.  I Lily Love You was striked off and the word credited was handwritten. How disappointing! they must have sold out right?

I logged on to my Mbeautylounge account and checked to see if I had any credits or vouchers but found nothing... I then went to the OPI section and found that I Lily Love You was still there. With the option to add it to your cart. So it wasn't sold out?

I decided to send a polite message to the company via their "contact us" page asking what happened to my order. I hit send and was promised an answer within 48 hours.
after 3 days with no answer, I sent another message. Briefer than the first but still polite. Again, no answer...
10 days later, I wrote them a pretty extensive message asking to be given a refund (it was $16 worth of polish!). I also told them I would be reviewing their company on my blog (as I am doing now).

A day later I received a message from them to tell me a voucher had been created for the amount I was owed. It could be found on my account on Mbeautylounge.com

Finally! after about a month of messaging, it looks like there is someone over at Mbeautylounge after all! Since I was prepping for the giveaway that just ended, I decided to use the voucher to get some polishes for you guys. I didn't trust Mbeautylounge but I sure as heck was not going to let them keep my $16! So I order 3 bottles of Zoya: Ivanka, Valerie, and Charla.

After about 12 days of processing, here is what I received:

This time Charla was missing! what is up with this company?? the order slip once again  claimed that I had been "credited"... I did send a message to the company about the missing polish but I am much to exhausted to deal with them any more. 

Overall, Mbeautylounge is not a place I will be ordering from any more. They have great prices and a variety of collections but this was not worth it. 

Oh well, live and learn right? 
have you ever had to deal with a dodgy company before?

Until next time ^_^


**EDIT** About 2 months since my last email, MBeautyLounge just issued me a refund for the missing Zoya. Can't promise they will do the same for you but it looks like patience pays off with this company...

Wednesday, February 22, 2012

Crackle Gradient- Everbella Shatter Crackle

Hello everyone!

Today I have something that I have been wanting to try for a while! A gradient using crackle polish!
Gradient manis can be tricky so I didn't know how well crackle polishes would blend to create a gradient effect.

This idea started when the lovely Florence over at Everbella sent me a nifty crackle polish kit for review. 
The kit came safely packaged in a corrugated box which was shipped in a bubble mailer  

Base color, Crackle polish, and Top coat
The crackle polish kit comes with a base color which varies, a crackle polish, and a small bottle of topcoat. The base color I received is a nice shimmery apple green and the crackle I was sent is BH14- Dark Green.
Everbella has more than 30 shades of crackle polish! a crackle for every occasion :D
From everbella.com Click to enlarge and see each in detail!
 Each of these crackle come in a kit (with base polish and topcoat) for only $4.99 which is a really good deal. Of course, you're probably wondering about the quality of the polish for that price right?
Well I'm going to show you swatches of the crackle further down, but the base polish was surprisingly good. The formula was a little thick but it applied nicely and the whole thing was opaque in 1 coat! The only real downside of this polish is the strange smell it has. I remember someone remarking that is smelled just like silly string, and truly it does. It's a mild chemically smell that goes away once the polish dries.

Now the crackle!!

Here is the final look of the mani:


I created it using 4 different crackle polishes and made 2 different gradients :)
Funky Fingers Teal Scales, X&D BH14, China Glaze Oxidized Aqua, Funky Fingers Silver Scales. The base color I used is Sally Hansen Brisk Blue

Funky Fingers in Teal Scales is dark green with load of glitter. It crackled decently well but it wasn't the best of the bunch! It must be applied over polish for the crackle effect to appear.


X&D in BH14 is dark green and dries to a matte finish. If you add topcoat, a subtle green shimmer emerges! the swatch on the nail wheel has no topcoat while my fingers above do so that you can see the difference :) This one took the longest to crack but had the nicest effect and formula overall. It did stain when I applied it over white polish but had no issues with it over Brisk Blue. This one does not need to be applied over polish to crackle!


China Glaze in Oxidized Aqua is light green metallic with small blue glitter. The formula for this one was very runny and didn't crackle as well as the others. I must be applied over polish to crackle.


Funky Fingers in Silver scale is a shimmery metallic silver. The formula on this one was pretty runny as well. It also tended to crackle in larger chunks. It must be applied over polish for the crackle effect to appear.


To create your own crackle gradient, all you need is a least 2 colors (preferably in the same color family) of crackle polish and a base color!
Take one of your first crackle and apply it from the cuticle side until half way down the nail. Then quickly take your second color and apply it a little bit above where the first color finished and drag it down to the tip. This should slightly blend the 2 polishes together. The crackling effect will take care of the rest!

Here is a nail wheel where I fooled around with some color combinations


As you can see, even though these are all different brands of crackle polish, they all seemed to blend together nicely!


I picked my 2 favorites from the wheel: Silver Scales to Oxidize Aqua to BH14 and BH14 to Teal Scales to create my gradient look

This is a really easy way to get gradient nails since the crackle polish breaks the whole thing up. It make the lines between the colors disappear! if you want to try this for yourself, you can pick up some great crackle polish at Everbella's online store: Everbella.com. Don't forget to use the code on the sidebar to get 10% off any item!

What do you think of the crackle gradient?

Until next time ^_^

*This item was sent to me for review, however, I provided my honest opinion of the product*


Tuesday, February 21, 2012

Nubar Mail!- Bynubar.com review

I was really excited when I saw the new Polka Dot set by Nubar. They are so pretty no??

image from bynubar.com

I was still on the waiting list for Lynnderella's Connect the Dots so I thought these puppies could satisfy my craving for black and white glitter toppers until I could finally get my hands on CTD...

I ordered my set from Bynubar.com. I looked around on amazon and other online retailers to see if I could get a better deal but in the end, if you want both White Polka Dot and Black Polka Dot, I recommend getting it directly from the source!
For $20 you get both Polka Dot toppers and Diamont Seal and Shine, which is a really good top coat!
The set came in this poly box. The outside of the box was very dusty... This picture was taken after I had blown most of the dust off, and there is still a lot there. However, the inside of the box was pristine so I didn't really care.
Here they are outside of the box! the Black Polka Dot reminds me of the black bean abyss they have at Moe's Southwest Grill. It's just a big pot of boiled black beans that you can have them put on pretty much anything you order. It looks like a bubbling cauldron of black plague but it tastes delicious!
White Polka dot is much more innocent looking in comparison no? As you can see here, the white is a little more of a pearly white. The glitters are a little translucent but still very pretty.
And of course the Diamont top coat peeking in the back!

Star Sparkle and Night Sparkle
 also went ahead and ordered 2 Nubar polishes that I had been lemming for! Star Sparkle, a silver holographic glitter, and Night Sparkle, a dark blue glitter. These are both full coverage glitters and take 2-3 coats...

My overall experience with Bynubar.com was rather pleasant. Shipping was a little higher than I expected it to be (at over $13 for 5 bottles of Domestic polish) so that was a little disappointing. I fiddled around with what was in my cart to try and figure out how their shipping works. For 1 bottle of polish, shipping to Ohio was $13 ish dollars, adding the polka dot kit and another bottle did not vary that price. Adding another 3 polish kit, however, increased shipping by about $1. So if you are going to order something from this site, I recommend you make it worth the shipping and order more than just a couple bottles...
*please be aware that shipping is likely to vary by location. Your shipping may be significantly different from mine if you live on the west coast for example*
It took about 3 days for my order to process and an additional 3 days for shipping. Shipping was done via UPS. I personally do not have a preference between USPS and UPS other than USPS usually being cheaper but I know that some of you do :)

Most of you probably know about the quality of this brand so I won't babble on too long about it. Mostly these met my expectation for the brand. I can't wait to mess around with these :D

Also, as luck would have it, the day I ordered these, I received an email from Llarowe saying that my bottle of Connect the Dots had been shipped >_<
Oh well, now I have lots of black and white glitter toppers to show you guys! woohoo!

What would you prefer, Nubar Polka Dot or Lynnderella Connect the Dots?

Until next time ^_^


Tuesday, November 2, 2010

Cherry Culture!

Sorry about the lack of updates :( I have been sick. Just a cold, but I've been spending all my free time sleeping to get rid of it. But now! I am better! so a long overdue review of Cherry Culture will start things back up

Alrighty! I ended my month-long (ish) no buy with this spree :D lots of nail polishes were on sale so I got quite a few.
This is after I opened everything up in the mail room :( I was too excited to see all my goodies
They were all wrapped in bubble wrap and arrived in pristine condition.
Shipping was free due to a promotion (if you spent a certain amount...)
A couple of nail treatments. Ive been using the whitener as a basecoat for about a week now, but I have seen no difference yet. Obviously it would take longer than a week to work so who knows!
Awesome metallics! need a couple of coats to go opaque though

My first LA Colors. The red was a jelly :( is there even a true red creme out there???

My first NYX polishes as well
This came in a set from LA Colors called explosive. $3 for four polishes!
A much needed brown creme and more glitter :D
 These little guys were my only issue with Cherry culture. It appears that they had the sinful colors labeled wrong. I was expecting (151) St. Thomas (the bronze color) to be a nice pearly white with a ton of glitter and (958) Let's Meet was labeled on the site as a green with golden shimmer... The bronze and yellow were very unexpected. They are super pretty colors. The only issue is that I already have polishes that are pretty much the same as both of these :(  I have the option of returning them for store credit but the shipping would kind of make it pointless. 
Maybe if I have a giveaway, I can throw these in :) for the moment, they sit on my desk...

Alright, so Cherryculture.com
good prices. nice selection. Not too sure about the customer service.... I emailed them about the mislabeling issue and never got a word back... Also, the mislabeling on their site has not yet been fixed so if you order a color, I recommend you double check with another website to make sure thats the color they are showing you. I believe this is only an issue with the sinful color polishes...
Other than this misadventure, I am enjoying my new goodies

Thursday, September 23, 2010

8ty8 Beauty- Budget friendly!


I am a China Glaze-holic. I love their formula. I love their colors. They are simply amazing. And also the reason I got into nail art (because of their water marbling video on their website). Unfortunately, I am a poor college student and their product isn't always the most affordable.
That will no longer be an issue however, since I found the AMAZING 8ty8 online store! For $2.68 a bottle, this make China Glaze cheaper than most drugstore brands. Yes, yes.. shipping costs are a hassle, but eh... Buy lots at once and the saving will definitely make up for the shipping costs.
My experience with 8ty8 beauty was great. Their website is minimalistic and easy to navigate. Lots! of nail polish brands like Color Club, Orly, Art Club, Seche Vite, and of course, China glaze. They also have rhinestones, decals, and accessories for a really good price. Shipping was $8 for me, which I see as fair. 
Here is my loot!

Tadah! All of this stuff, with shipping, cost me $30
For Audrey, Agent Lavender, Peachy Keen, Secret Peri-wink-le
CC- Pucci-licious, Orly- Mint Mojito
3-D Stickers ($1)
Double ended nail tools

the other ends...

In conclusion, I recommend this store for polish more than tools and accessories.
If you want to know more, just ask me :)